🔄 Create a Theme Scheduling
Creating a theme scheduling is the easiest way to automatically change your Shopify store theme at a specific date and time. This guide walks you through the entire process step by step.
PrerequisitesDirect link to Prerequisites
Before creating a scheduling, make sure you have:
- An active subscription to Léon - Theme Scheduler
- Admin access to your Shopify store
- A target theme you want to schedule (must not be locked, archived, or a demo theme)
- Access to the Schedulings page in your Shopify admin
Step-by-Step GuideDirect link to Step-by-Step Guide
Step 1: Navigate to the Create Scheduling PageDirect link to Step 1: Navigate to the Create Scheduling Page
- Go to your Shopify admin dashboard
- Click on Apps in the left sidebar
- Click on Léon - Theme Scheduler
- Click the Create scheduling button (or + Create button if visible)
You'll now see the scheduling creation form with three sections:
- Select a theme (Theme Picker)
- Select a date (Date Picker)
- Select a time & timezone (Time Configuration)
All sections must be completed before you can create the scheduling.
Step 2: Select a ThemeDirect link to Step 2: Select a Theme
The first step is to choose which theme you want to switch to:
- In the Theme Picker section, click "Select a theme"
- A modal window will open showing all available themes in your shop
- Select the theme you want to schedule
- The form will display your selected theme and unlock the date picker section
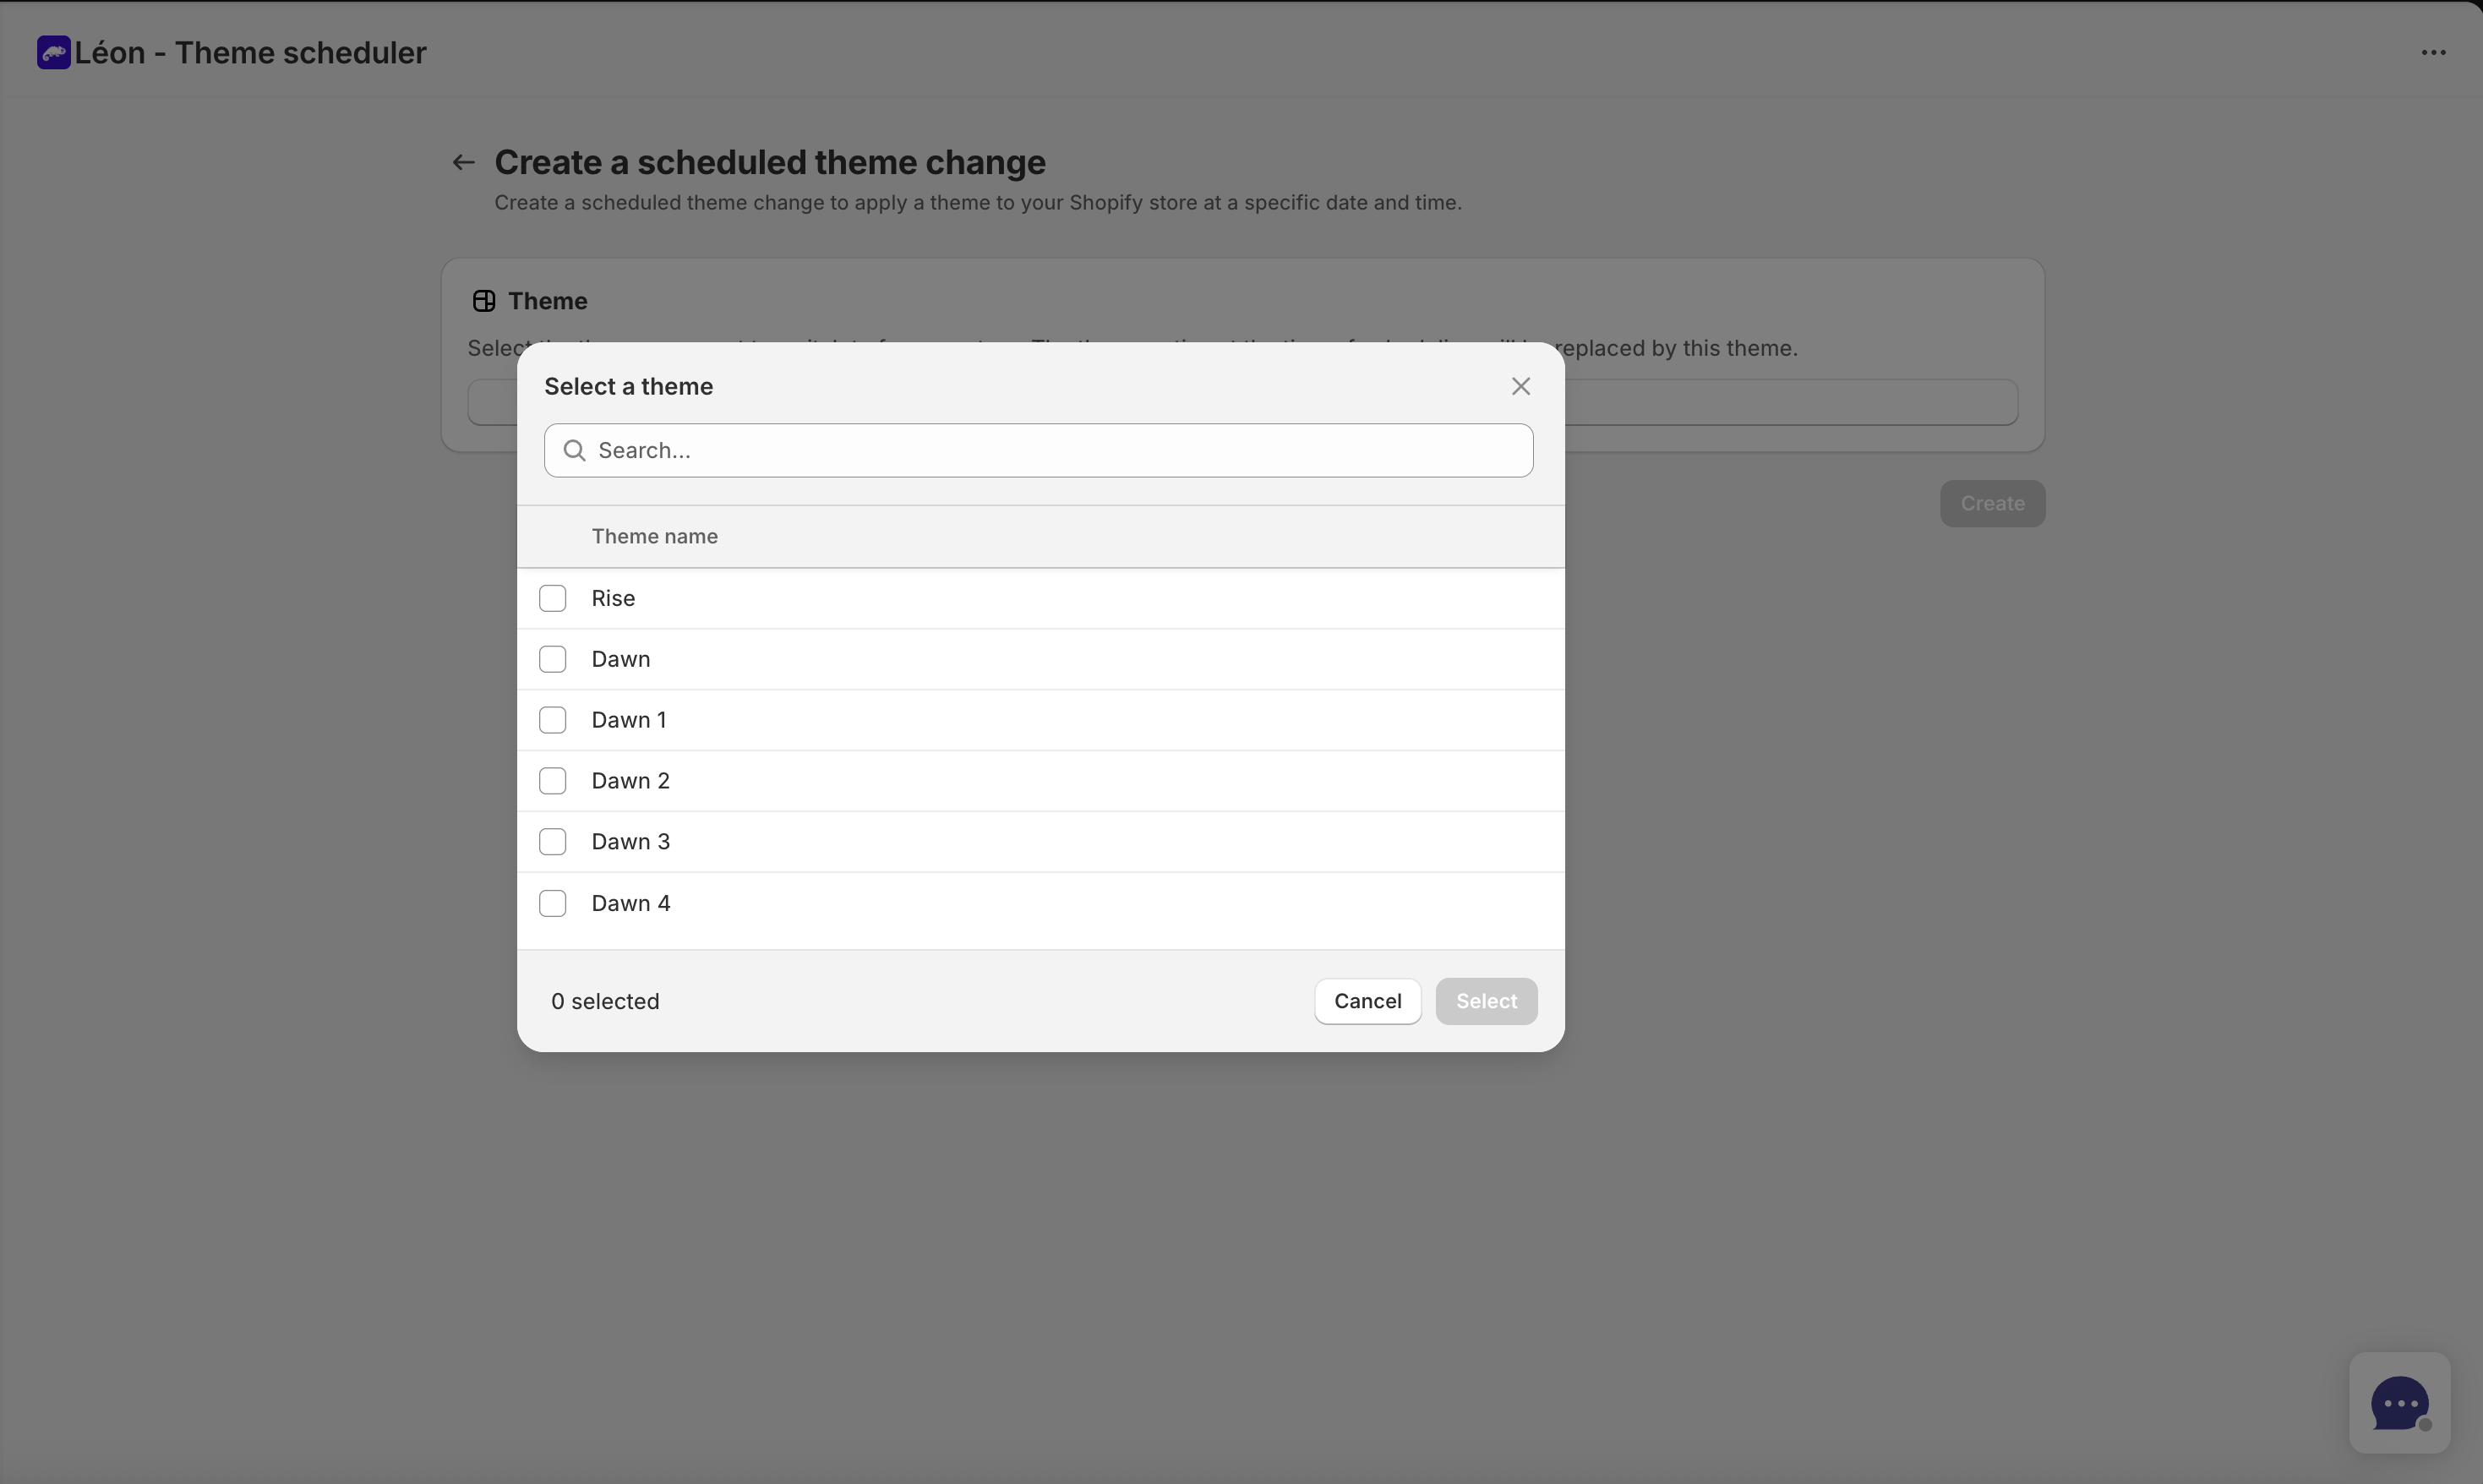
What themes can I select?
You can select any theme except:
- Locked themes (indicated by a lock icon) - these are protected by Shopify
- Archived themes (indicated by a folder icon) - these are archived and inactive
- Demo themes (indicated by a demo label) - these are trial/demo versions
If the theme you want to schedule is currently locked or archived, you'll need to make it available in your Shopify theme settings first.
Step 3: Choose a Schedule DateDirect link to Step 3: Choose a Schedule Date
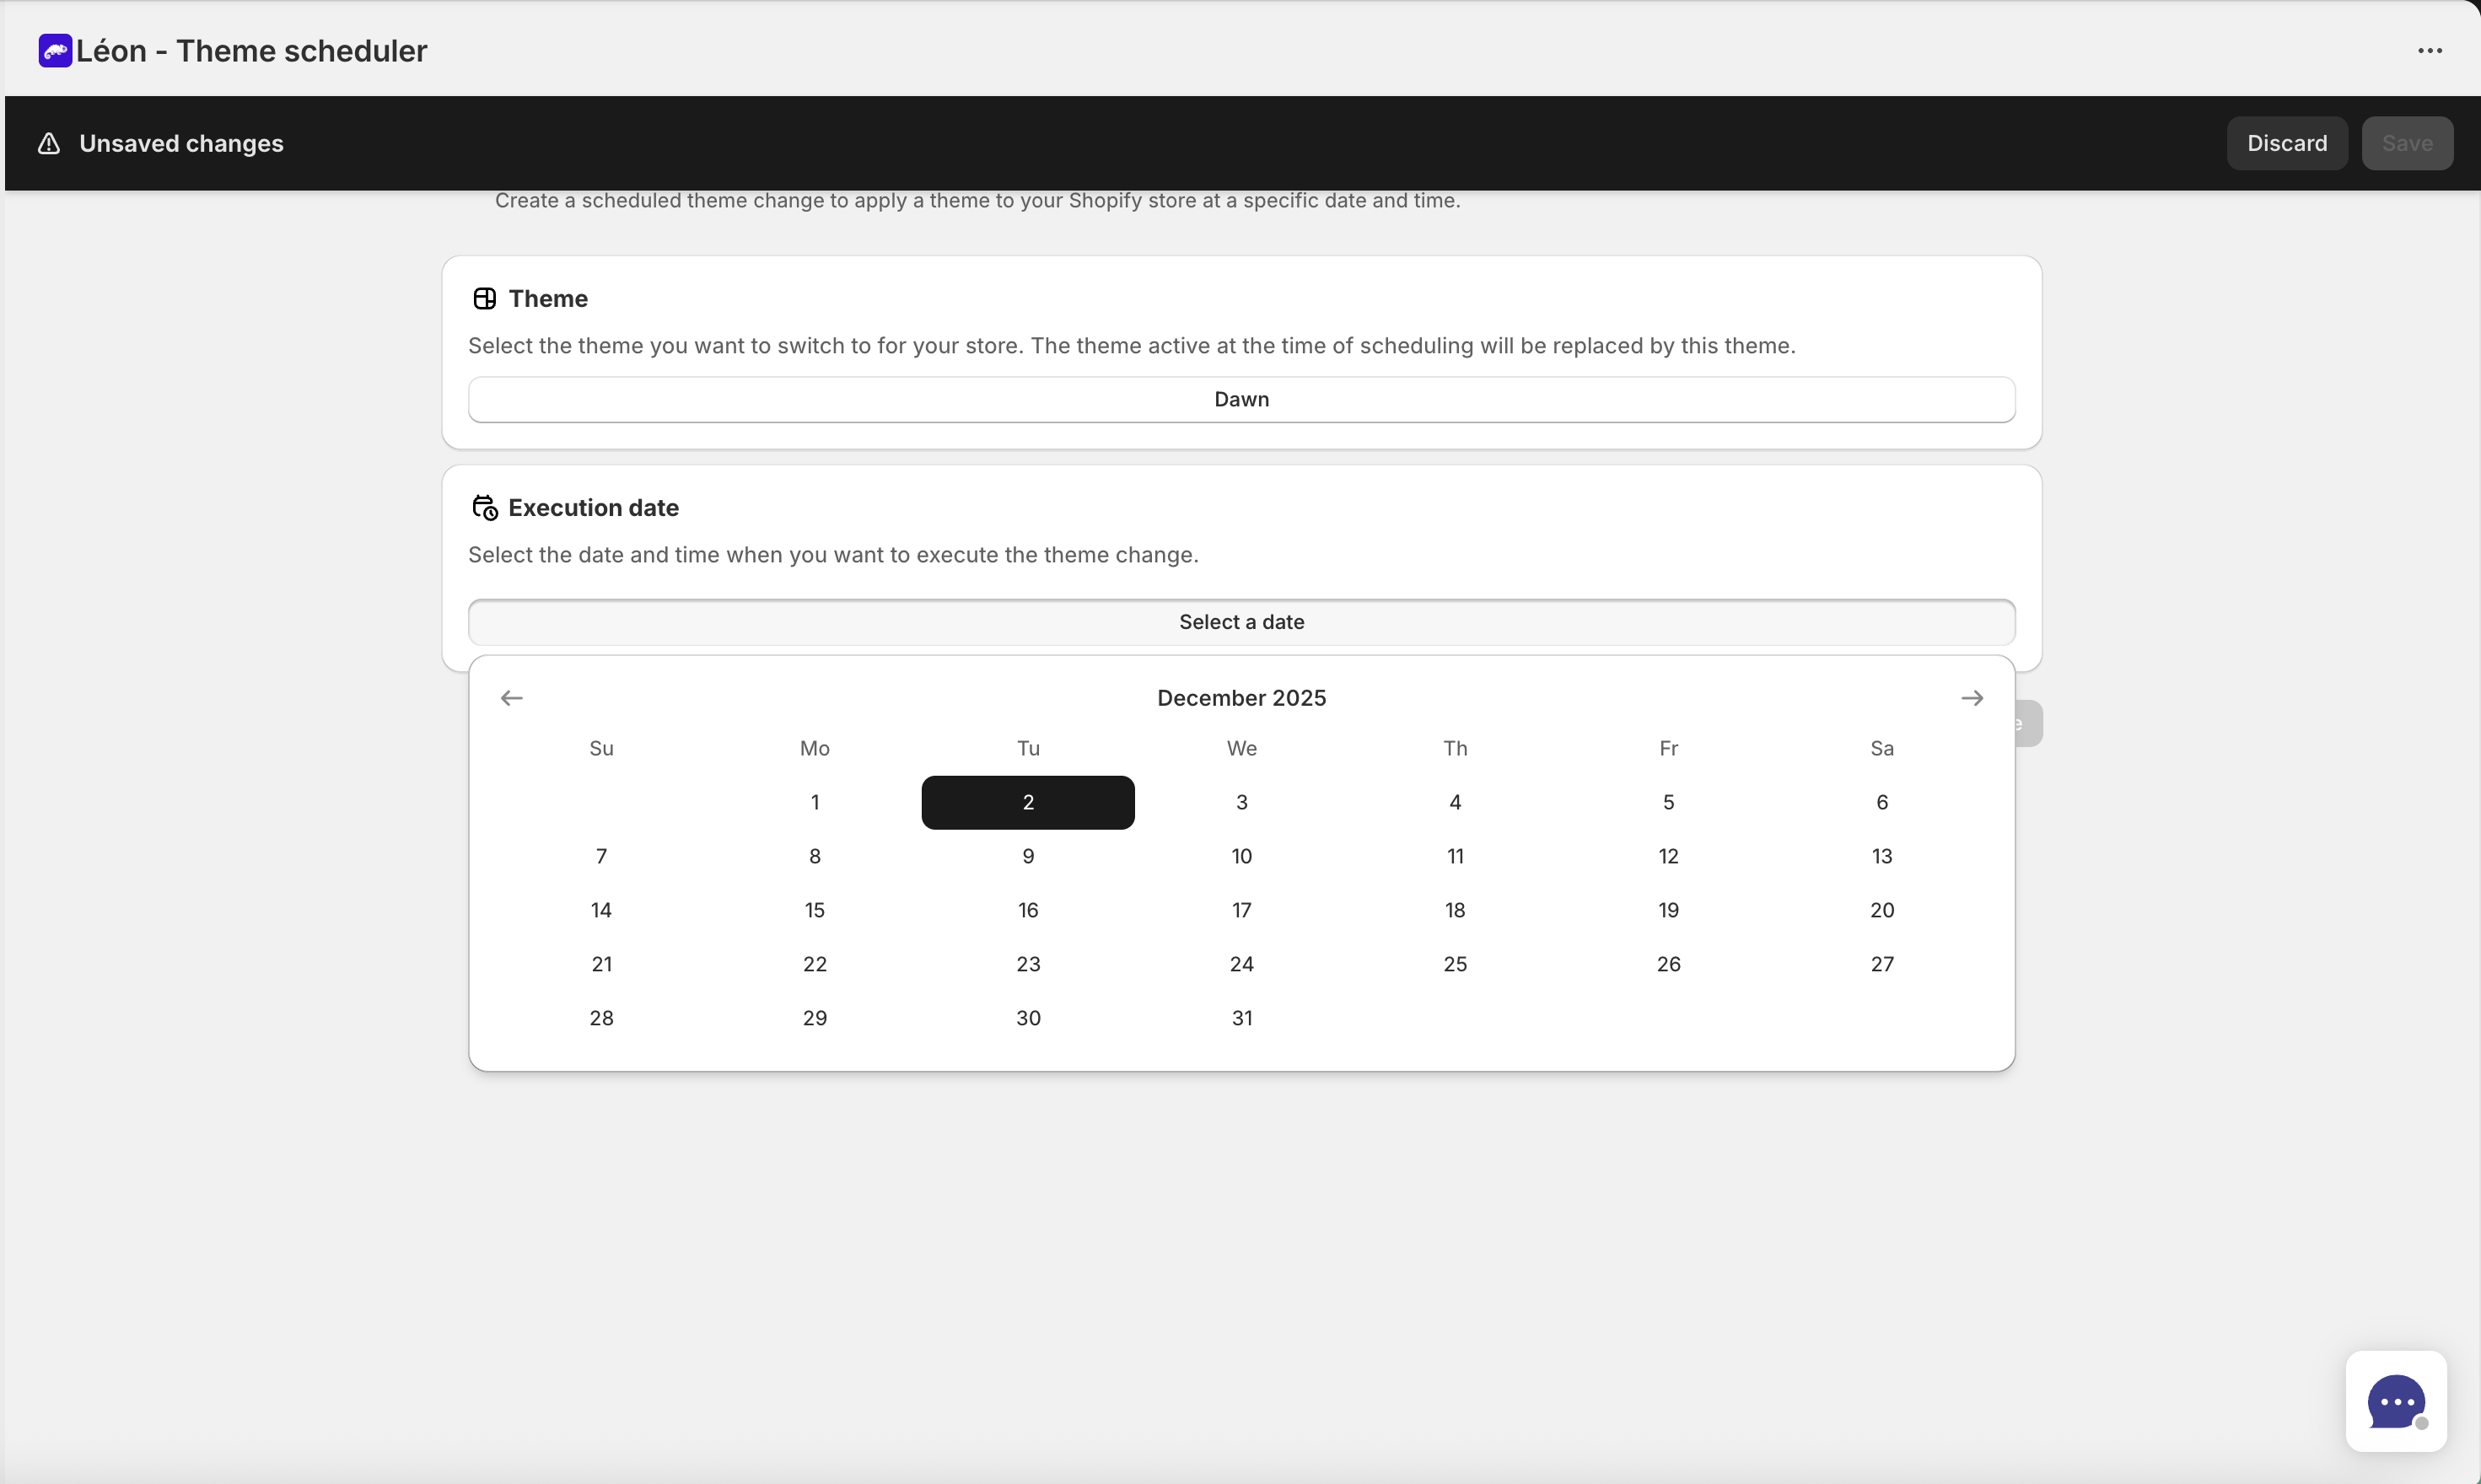
Once you've selected a theme, the date picker becomes active:
- Click the date button in the Schedule Date section
- A calendar will open showing available dates
- Select the date when you want the theme change to occur
- The calendar only shows dates from today onwards (you cannot schedule in the past)
- You can schedule up to 2 years in the future
- Current day selection: You can select today if you choose a future time (see Step 4)
- Up to 2 years ahead: Plan your theme changes well in advance
Step 4: Configure Time & TimezoneDirect link to Step 4: Configure Time & Timezone
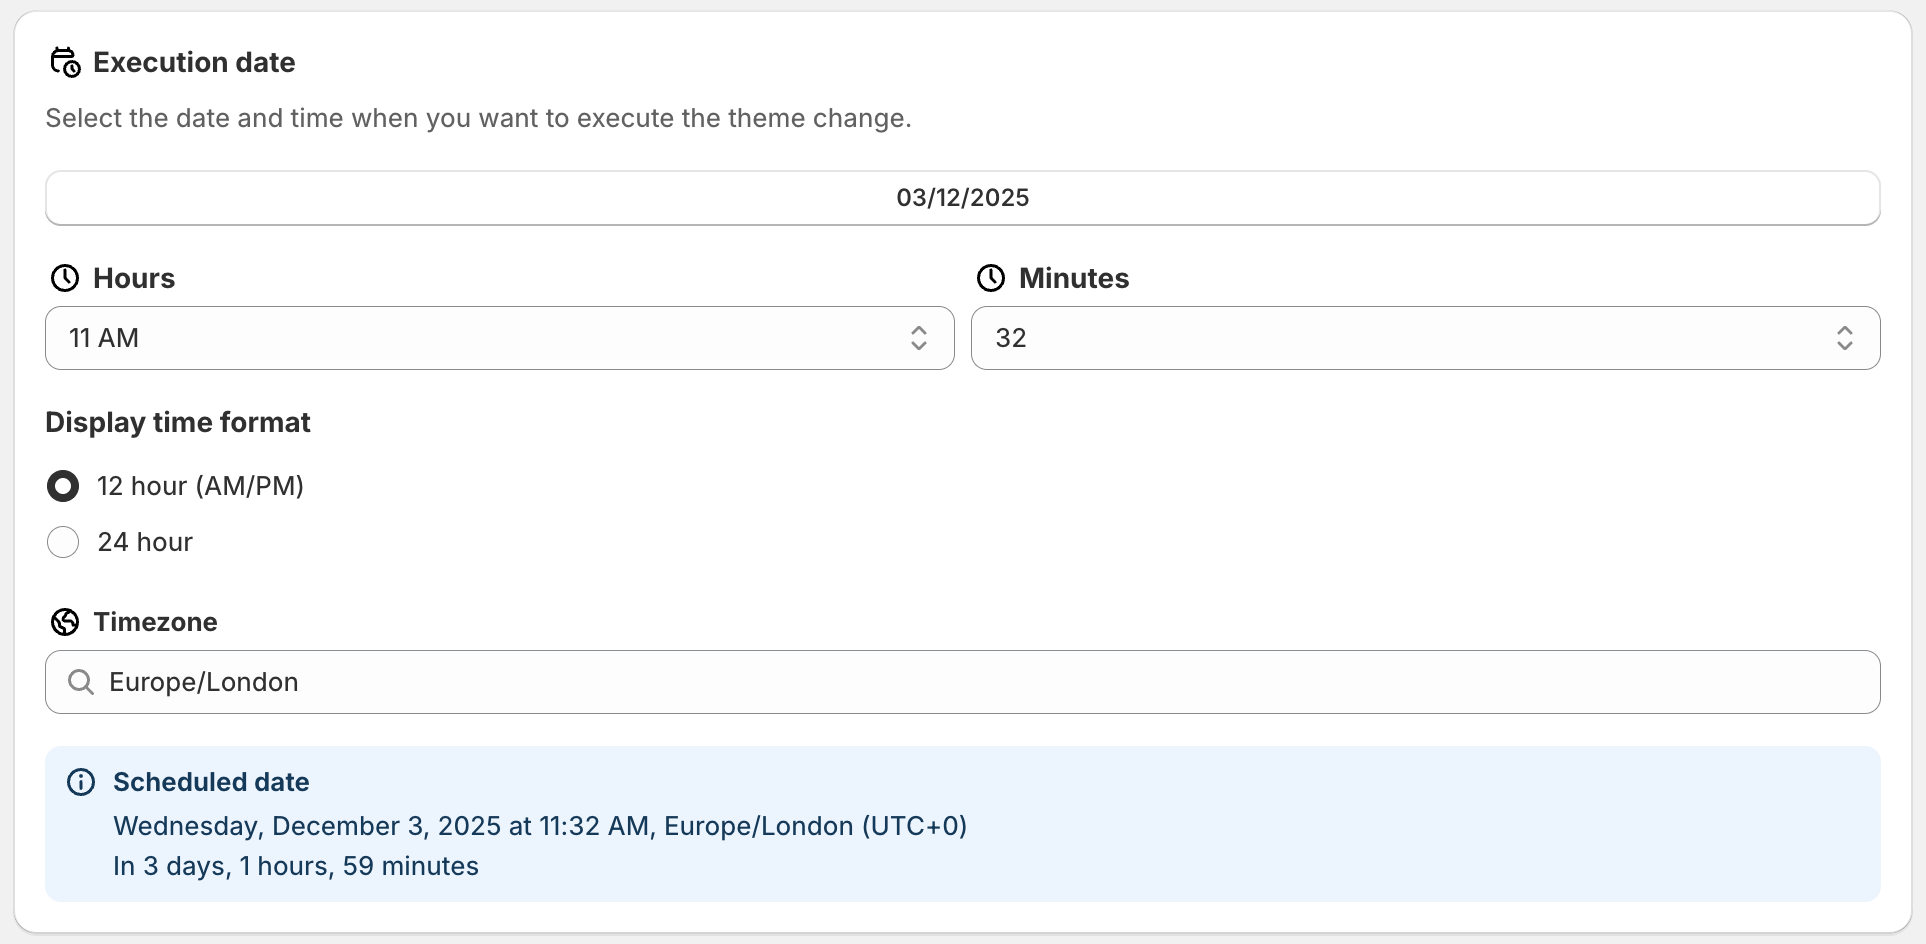
This is the final step before creating your scheduling:
-
Select the hour from the dropdown
- If you prefer 12-hour format: shows hours with AM/PM (e.g., 2:30 PM)
- If you prefer 24-hour format: shows hours 0-23 (e.g., 14:30)
-
Select the minutes from the minutes dropdown
- Choose from 0-59 in increments of 1 minute
-
Select your timezone from the timezone picker
- Start typing to filter the list (e.g., "Europe/Paris", "America/New_York")
- All times are converted to UTC internally but displayed in your selected timezone
-
Optional: Choose time format preference
- Toggle between 12-hour (AM/PM) and 24-hour format
- This affects how times are displayed throughout the app
Why Timezone Matters:
The timezone you select is crucial because it determines when your theme change actually occurs. For example:
- If you schedule 2:00 PM UTC+1 (Paris time), that's different from 2:00 PM UTC
- The system converts your local time to UTC for storage and execution
- All scheduled times are executed at the exact moment you specify in your local timezone
Finding your timezone: Common timezones include:
- 🇫🇷 Europe/Paris
- 🇺🇸 America/New_York
- 🇬🇧 Europe/London
- 🇯🇵 Asia/Tokyo
- 🇦🇺 Australia/Sydney
If you're unsure, check your computer's timezone settings or search for your city/country.
Step 5: Review & CreateDirect link to Step 5: Review & Create

Before submitting, take a moment to review:
- Theme: Verify you've selected the correct theme
- Date: Confirm the scheduled date is what you intended
- Time: Double-check the time and timezone
- The form displays "Remaining time" showing how long until the schedule executes
Once everything looks correct:
- Click the "Create" button at the bottom of the form
- If validation passes, your scheduling will be created
- You'll be redirected to the Schedulings list page
- Your new scheduling will appear in the list with status "Scheduled"
Form ValidationDirect link to Form Validation
The form validates all your inputs before allowing creation. If there are any issues:
- Error messages appear in red at the top of the form
- Specific field errors are highlighted
- The Create button remains disabled until all errors are resolved
Common validation issues:
| Error | Cause | Solution |
|---|---|---|
| "Theme selection is required" | No theme selected | Click "Select a theme" and choose a theme |
| "Schedule date is required" | No date selected | Click the date button and pick a date |
| "Scheduled date must be in the future" | Date/time is in the past | Select a future date or later time |
| "Timezone is required" | No timezone selected | Choose a timezone from the list |
What Happens After Creation?Direct link to What Happens After Creation?
Once your scheduling is created:
- Status is "Scheduled": Your scheduling appears in the list with this status
- Automatic execution: At the exact scheduled time, your theme will automatically change
- Status updates to "Executed": After the theme change completes, status changes to "Executed"
- You can view history: Check the schedulings list to see past and upcoming schedules
TroubleshootingDirect link to Troubleshooting
I can't create a scheduling
- Verify you have an active subscription (check Settings > Subscription)
- Ensure you're logged in as a shop admin
- Check that all form fields are filled correctly
My theme didn't change at the scheduled time
- Verify your timezone is correct
- Check if the scheduling status shows "Executed" in the list
- Ensure you weren't manually changing the theme at the same time
I selected the wrong theme - what do I do?
- Delete the scheduling from the list
- Create a new scheduling with the correct theme
- The deleted scheduling will not execute
Next StepsDirect link to Next Steps
After creating your first scheduling:
- Monitor execution: Check the Schedulings list to see when it executes
- Create more schedulings: Plan multiple theme changes for campaigns, seasons, etc.
- Set up notifications: Enable email notifications for scheduling confirmations (see Notifications)
- Adjust settings: Configure your preferred timezone and time format in Settings
Best Practice: Create schedulings a few days in advance to ensure everything is set up correctly, then monitor the execution on the scheduled date.